Managing Virtual machines
To view the virtual machines on a server expand the server node in the Server Tree. When a Virtual machine is selected information about that VM will show in the Details panel.
Here you can se a small preview of the VM Screen and a CPU-Graph. There is also a Snapshots tab with snapshot information and a Status History Tab displaying VM statuses. When the VM is Replicated there also is a Replication tab showing replication information and statuses.
VM Settings Dialog
To open the VM settings dialog, right click on the VM and select the “settings..” menu item in the popup menu or click on the “Settings” button in the VM summary tab.
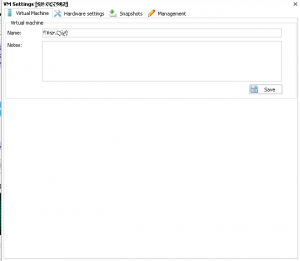
Virtual Machine Tab
In the First tab of the VM Settings dialog you can rename the VM and add notes for it.
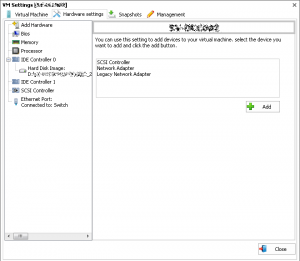
Hardware Settings Tab
In this tab you can add, change and remove hardware of the VM. Hardware that can be managed include BIOS Settings, Memory, CPU count, Hard disks (VHD, VHDX), netwokcards (including legacy) and more…
To add Hardware select the “Add hardware” item on the left and select what type of hardware to add.
To change existing hardware, select it in the list to the left and change the settings. Then click “apply”.
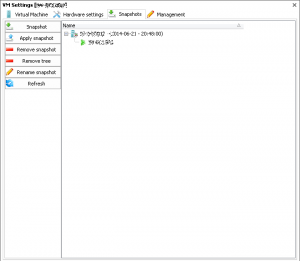
Snapshots Tab
Virtual machine snapshots capture the state, data, and hardware configuration of a running virtual machine.
Snapshots provide a fast and easy way to revert the virtual machine to a previous state. For this reason, virtual machine snapshots are intended mainly for use in development and test environments. Having an easy way to revert a virtual machine can be very useful if you need to recreate a specific state or condition so that you can troubleshoot a problem ( http://technet.microsoft.com/sv-se/library/dd560637(v=ws.10).aspx).
To take a snapshot in HVM, right click the VM and then click the “Snapshot” menu item. Or Select the machine and go to the Snapshot Tap in the “Details panel” and then click the “Snapshot” button.
In the Snapshot tab you can create, Apply, remove and rename snapshots…
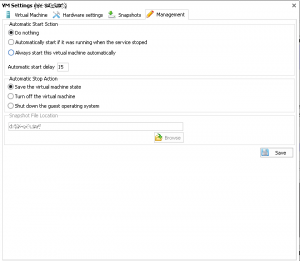
Management Tab
On the management tab you can change settings for automatic start and stop actions.
Creating Virtual machines
To create a virtual machine right click the server you want to create it on and click the “New VM” menu option.
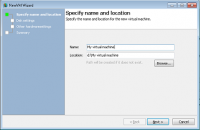
The New VM Wizard opens.
Specify the name and where to store the VM configuration. Click “Next”…
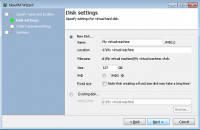
On page 2 in the wizard you select settings for the disk to be used bythe new VM. You can choose to create a new disk or use a existing one. When creating a new disk there is a set of options like name, size, type and location. You can also choose to create a fixed size disk.![]() Be aware that creating a fixed disk can take a long time. The wizard cannot attach the disk while it is being created so you will have the option to wait or not to wait for the creation process to complete. If you choose not to wait you have to attach the disk manually later.
Be aware that creating a fixed disk can take a long time. The wizard cannot attach the disk while it is being created so you will have the option to wait or not to wait for the creation process to complete. If you choose not to wait you have to attach the disk manually later.
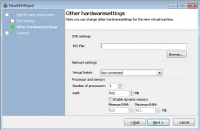
On page 3 of the wizard you specify some other hardware settings like ISO-file to attach to the DVD, A Switch to connect the networkcard,
CPU and RAM settings..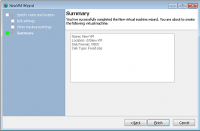 The last page gives you a summary of the new VM to be created. Click “finish” to start creating the machine…
Virtual Machine actions
 Right Clicking a machine in the “server tree” will show a popup menu with actions that can be performed on the VM.
- Start VM
- Shutdown OS - Shut down the OS off the VM (Requires Integration services to be installed).
- Power OFF VM
- Pause VM - Puts the VM in a Paused state The VM is no longer running but retains its memory.
- Suspend VM - Puts the VM in a “saved” state. The memory is returned to be used by other machines.
- Reset VM
- SnapShot - Takes a snapshot of the VM.
From here you can also attach ISO-FIiles and Connect the the VM.
Connecting/Controlling a VM
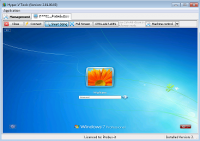
To install operating systems or work with the VM you will sometimes need to connect to the “Console” session of the VM. You can do this with HVM by right clicking a VM and select “Connect” From the popup menu or by double clicking the VM. By holding down the SHIFT- Key you can also open the connection in cVM.
On the top of the “Control” window is a set of buttons.
- Close- Will close the connection and the window.
- Connect - Connects/reconnects to the VM
- Smart sizing - Toggles the smart sizing feature.
- Full Screen - brings the connection upp to full screen.
- CTRL+AL+DEL - Sends the Ctrl-Alt-Delete key combination to the VM. You can change the local representation of this key combination from the “Select hotkey” dropdown. When you are connected in Full Screen, use the selected key combination to send CTRL+AL+DEL to the virtual machine.

